
The sample was perfect. The bulk order wasn’t.
If you’ve worked with a factory for long enough, you’ve heard some version of that sentence, usually followed by a second one: “and we only found out at the end.” On a 5,000-piece order, a bad batch is an expensive lesson. On a 150-piece order, it can be the whole season.
Most of what’s written about garment quality control assumes large orders and a dedicated inspection team. Small runs of 50 to 500 pieces work differently. There’s no QC department, the margin for error is thin, and most problems are decided long before the first piece is sewn. This is how we approach it from the factory side.
Garment Quality Control Basics
The two terms get used interchangeably, but they do different jobs.
Quality Assurance
Quality assurance in apparel industry practice is what you do to prevent problems: clear specs, approved samples, agreed standards.
Quality Control
Quality control in clothing industry practice is what you do to catch the ones that get through: measuring, inspecting, counting defects. Quality control in garment manufacturing works only if the assurance side is in place first, because inspectors need something to inspect against.
The usual stages run from checking incoming fabric through sampling and pre-production approval to inline checks during sewing and a final inspection before packing. The rest of this post concentrates on the parts that matter most when the order is small.
A quick word on the first stage, because it’s easy to overlook. Quality control in garment production starts with the cloth. Fabric rolls can be checked for flaws using the four-point system (ASTM D5430), which scores defects by size and totals them per 100 square yards. Around 40 points per 100 square yards is a common acceptance limit, though the standard itself doesn’t set one; buyers agree their own, and stricter programs go lower. Small brands rarely run the full test, but even a visual check of every roll under good light, plus a weight and shrinkage check on a swatch, removes a surprising share of later problems.
Write the spec so nobody has to guess
Most “factory mistakes” start as vague specs. If a tech pack says “relaxed fit” and gives no numbers, the factory fills the gap with its own idea of relaxed, and the sample reflects that guess.
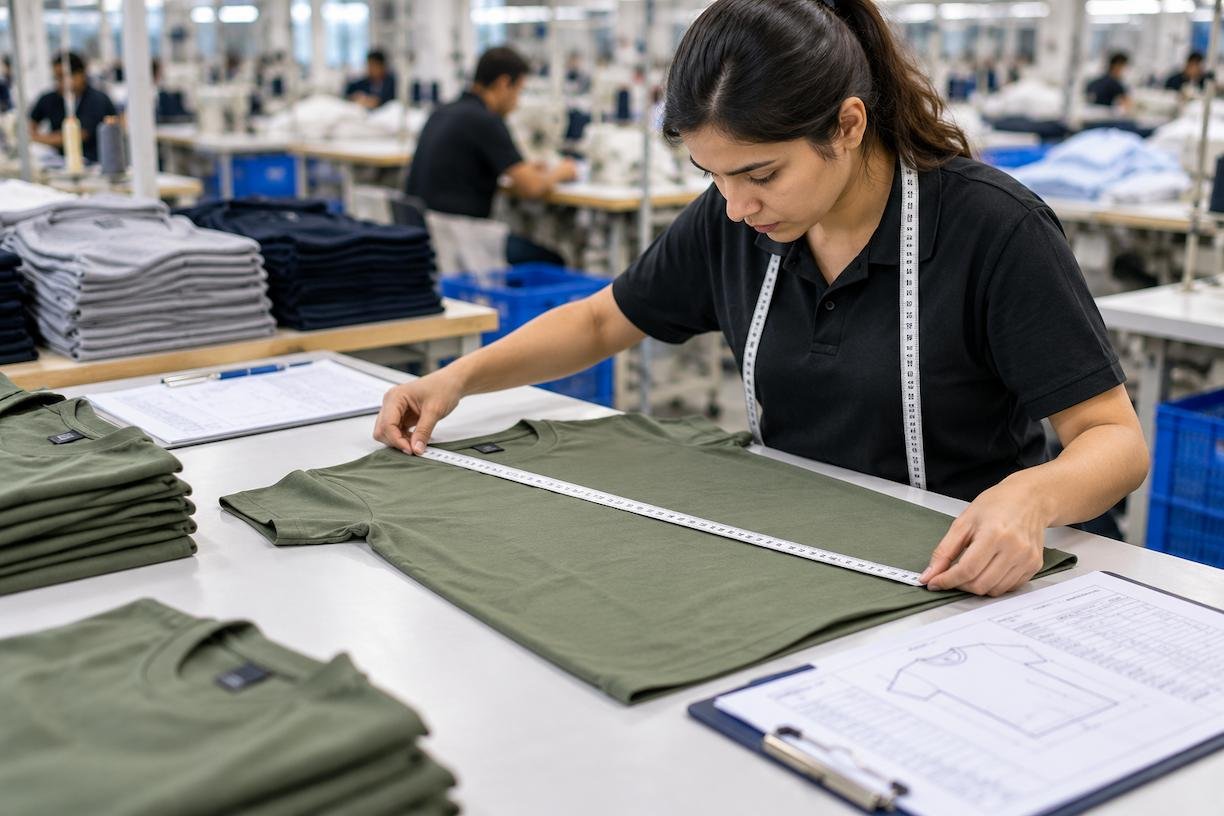
Every point of measure (POM), such as chest, body length, sleeve, and hem, needs a target number and a written tolerance agreed upon before cutting. A tolerance of ±0.5 inch on most points is common, with tighter limits at critical fit points. Without it, “close enough” has no definition, and nobody can fairly call a piece wrong. If you need a starting point, this garment spec sheet guide covers how to lay these out.
Here’s what a few lines of a spec look like for a basic t-shirt in the base size. The numbers are illustrative:
| Point of measure | Target | Tolerance |
| Chest width (1″ below armhole) | 20.0″ | ±0.5″ |
| Body length | 27.5″ | ±0.5″ |
| Sleeve length | 8.25″ | ±0.375″ |
| Neck width | 7.5″ | ±0.25″ |
Nothing here is complicated. What matters is that the numbers exist in writing before cutting starts, so the person measuring finished garments and the person who approved the sample are reading the same page. Vague specs are the most common reason a factory guesses, and a guess that looks reasonable to the factory can look wrong to you.
Seal the PP sample, and never approve from photos
A pre-production (PP) sample is made on the real line, from the real fabric and trims. Once approved, both sides sign and date it, and it becomes the sealed sample: the physical standard every bulk piece is checked against.
This is the step most small brands skip, and it explains the “sample was perfect, bulk didn’t match” complaint better than anything else. Without a sealed sample, there’s no agreed object to compare against, only memories and email threads.
The related mistake is approving photos. A photo can’t show shrinkage, fabric hand, a twisting seam, or a measurement that’s 1 inch off. Handle it, wash it, measure it.
When the PP sample arrives, check it against the spec rather than against your impression of it:
- Measure every point of measure and compare with the tolerance.
- Wash and dry it the way the care label will say, then measure again. A common limit is about 5% shrinkage after three washes.
- Inspect construction: seam types, stitch density, stress points, and hems.
- Confirm trims, labels, and print or embroidery placement against the tech pack.
- Check color against the approved reference in daylight, not under a desk lamp.
Then sign it, date it, and tag it. Many brands also keep a second copy, sometimes called a counter sample, so that if there’s ever a dispute, both sides can point to an identical reference. A sealed sample that only the factory holds is a weaker standard than one you can put on a table yourself.
Measure every size, not just the one that fits
A sample that fits the model proves one thing: that the base size works. Grading, the scaling of that pattern to other sizes, is where “the sample fit but the other sizes came out wrong” comes from.
Ask for a size set: a sample in each size, measured against the spec before bulk starts. It costs a little more up front. It’s far cheaper than discovering that your XL runs like a large after 300 pieces are cut.
Control shade at the cutting table
Fabric from different rolls and dye lots can differ slightly in color even when each is “correct.” The fix happens before sewing. In shade separation, fabric is checked roll by roll under consistent light, grouped by shade, and cut so that every panel of one garment comes from the same group. Bundles are labeled by roll or lot so panels don’t get mixed on the floor.
A sleeve from one lot and a body from another is a defect no amount of final inspection can repair.
Check during sewing, not just at the end
Finding defects only at the end is slow and costly, because by then everything has been sewn. Two habits help.
First-piece approval. The first finished piece off the line is measured and examined against the sealed sample before the run continues. If something’s off, you’ve lost one garment, not a hundred.
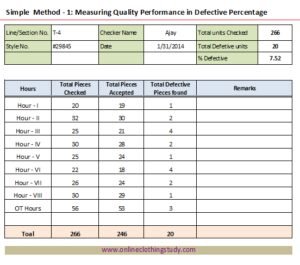
Inline inspection. Checks at set points during sewing catch repeating errors while they’re still cheap: uneven collars, skipped stitches, and wrong thread color. Factories often track this as DHU, defects per hundred units: defects found divided by units checked, multiplied by 100. A rising DHU says something has changed on the line.
When defects do appear, root cause analysis matters more than the fix. Repairing a seam solves one garment. Asking why it happened (a worn needle, a bad pattern file, a rushed operator) stops the next fifty.
What actually counts as a defect
Before anyone inspects anything, agree on what a defect is. Otherwise, the same stray thread is a “minor” to the factory and a “major” to the customer who returns the garment.
- Critical: unsafe or unlawful, such as a broken needle left in a garment or missing legally required labelling.
- Major: a customer would likely return it. Open seams, holes, measurements outside tolerance, a misaligned print, a visible shade difference between panels, and a broken zip.
- Minor: cosmetic and unlikely to cause a return, such as a loose thread end or light pressing marks.
Loose threads are the gray area. A trailing end is minor, but loose stitching at a stress seam moves toward major. Write the classification down and share it with the factory before production so nobody argues about it on inspection day.
Small lots: AQL or 100% inspection?
Standard final inspection uses AQL sampling under ISO 2859-1 (the US equivalent is ANSI/ASQ Z1.4). An inspector checks a sample sized by lot size and counts defects against the critical, major, and minor classes above. Apparel commonly uses AQL 2.5 for major and 4.0 for minor defects.
At the standard General Inspection Level II, the sample sizes for small lots look like this:
| Lot size (pieces) | Sample size |
| 26-50 | 8 |
| 51-90 | 13 |
| 91-150 | 20 |
| 151-280 | 32 |
| 281-500 | 50 |
Your inspector can confirm the exact accept and reject numbers for your lot, and it’s worth asking before the inspection rather than after.
The catch for small runs is that a sample of 20 to 50 pieces is useful but blunt. A handful of defects in a small sample can swing the result either way, and a pass doesn’t mean the unchecked pieces are clean. It means the lot, statistically, is acceptable.
For runs at the smaller end, 100% inspection is often practical. Checking every piece takes a few minutes each, so a 100-piece order is a morning’s work, and it ships only pieces that have actually been looked at. At the larger end, AQL sampling plus the inline checks above usually does the job. Higher-value garments, complex construction, or a first order with a new brand tilt the decision toward checking everything.
Write it down
Quality control that lives in someone’s head disappears when that person is away. Keep a short record for every order: the signed spec and tolerances, the sealed sample, the size-set measurements, shade-lot notes from cutting, the first-piece result, inline check results with DHU, and the final inspection report with photos of any defects found.
This isn’t paperwork for its own sake. When a problem turns up later, a customer complaint or a retailer rejection, the record shows where it entered the process. It also gives the next order a head start, because you can see what went wrong last time and what the factory already corrected.
When bulk doesn’t match the sample
Even with all of this in place, bulk can come back wrong. What happens next depends on what you can show.
With a sealed sample, written tolerances and a measurement record, the conversation is specific: this point was 1 inch over tolerance on these pieces. The typical outcomes are rework of the affected pieces, a reinspection after correction, a negotiated adjustment, or in serious cases, a partial remake. Without that documentation, it’s one person’s recollection against another’s, and that rarely ends well for the buyer.
It also helps to keep final payment tied to a passed inspection. The factory then has a clear reason to resolve problems quickly, and you aren’t left chasing a fix after the money has gone.
Wrap Up: A Checklist for Your Next Small Order
Good garment quality control on a small run isn’t about inspecting harder at the end. It’s about deciding what “right” looks like before cutting, then checking against it at every stage. Before your next order of 50 to 500 pieces, confirm that you have:
- A tech pack with every point of measure and a written tolerance
- A PP sample made on the real line, signed, dated and sealed
- A size set measured against the spec, not just the base size
- Fabric checked roll by roll and grouped by shade before cutting
- First-piece approval before the run continues
- Inline checks with defects logged and root causes recorded
- A final inspection against the sealed sample, 100% or AQL depending on lot size
Work through these seven points and most “the sample was perfect, bulk wasn’t” stories stop before they start. Whichever factory you work with, ask where each of these checkpoints sits in the production schedule.
Frequently Asked Questions
What is garment quality control?
It’s checking, at several points, that the garments you’re making match the spec and the approved sample. That means measuring pieces, looking for defects and keeping records, from the fabric stage right through to packing.
Why is quality control important in the garment industry?
Perfect, high-quality apparel is the cornerstone for establishing a brand’s credibility with customers and is a major factor in sustaining brand loyalty. It matters because defects cost more the later they’re found.
- Assure customer satisfaction and brand loyalty
- Prevent product defects and reduce returns
- Conform with regulations and safety standards
How do you carry out quality control in garment making?
Start by writing down the spec and tolerances. Next, approve and seal a PP sample, then measure a full size set. Before cutting, sort the fabric by shade. Once sewing starts, approve the first piece, then run inline checks as the run continues. Finish with a final inspection against the sealed sample.
What is inline inspection in the garment industry?
Someone looks at pieces at set points along the line, so a repeating problem like an uneven collar gets caught after ten pieces, not after two hundred.
How many types of inspection are there in the garment industry?
People usually describe four: incoming material, inline (during production), pre-final and final. Some factories merge or rename them, so ask what each term covers before you agree a plan.
About the Author
Shaheryar Rafique is the ORM Manager at Affix Apparel, a Los Angeles cut-and-sew clothing manufacturer that produces small-batch runs for emerging and independent brands. He works closely with the production and quality teams on sampling, inspection and customer communication for low-MOQ orders.