

Traditional vest designs include a round neck, half-sleeve and sleeveless vest. Piping with self-fabric on neck and armhole. As the fashion trend demands a continuous change in vest designs, vest manufacturing brands make vests in many other colours and making the vest more attractive product. Rib fabrics are also used in making a vest.
In India, the vest is known as Baniyan (in Hindi), and Sando. In some part of India vest is called Ganji (in West Bengal).
In this post, I will be explaining the vest manufacturing process briefly.
Process flow of inner vest (Sando) manufacturing
3. Knitting of fabric – In the vest manufacturing knitting is the main process. Knitted fabric is the primary material for the vest and quality of the fabric is very essential. The stitching process has very few operations. Vest manufacturers prefer to set-up their own knitting unit.
There are many benefits to installing your own knitting machines. Including cost control of the fabric and vest, transportation of materials and maintaining fabric quality. Fabric is knitted in tubular knitting machines and tube width is maintained as per the finished tube width of different vest sizes.
4. Fabric sourcing – If you are knitting your own fabrics, you do not need to purchase fabric from outside. In case you do not have a knitting plant (knitting machine) and in case your fabric requirement is higher than your knitting machine capacity then you need to purchase the knitted fabrics.
5. Fabric quality checking – You need to check the fabric before starting cutting the tubes for vests. This process will help you in reducing generating defective vest due to fabric faults. Check the list of defects found in knitted fabrics. It is always wise to remove defective fabrics (that have holes, hard stain, foreign fibre) before cutting the fabric.
Making the inner vest Three types of vests are found based on their construction.
- no side seams
- side seam in one side
- side seam in both sides
Depending on the design you need to cut the pattern. Knitted fabric tubes (hose) are used in making inner vests for the designs in which no side seam there.
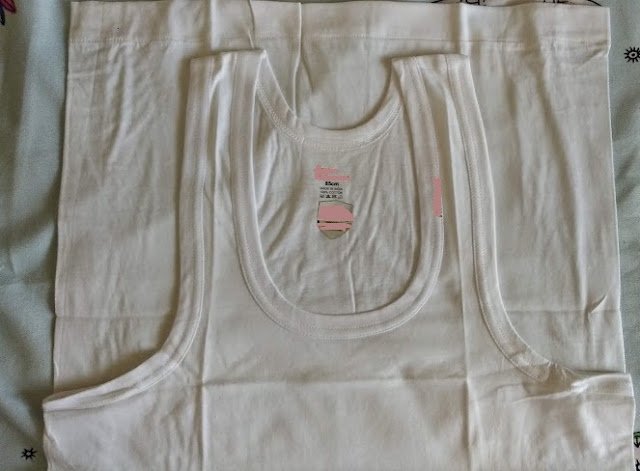
The image shows a vest (Baniyan) without a side seam. For this product, Tubular fabric is used. Fabric is knitted as per the fabric width required in the finished vest.
You need to cut the fabric tube as per the pattern.
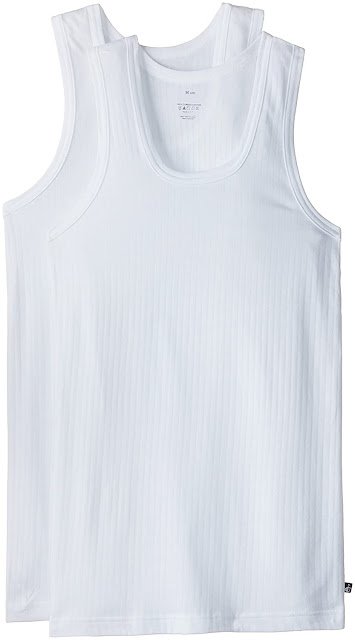
Preparation processes for vest stitching
Binding tape cutting – Cut the binding tape using a piping cutter.
Cutting vest panel from fabric roll – Spread the fabric tube on the cutting table. Using patterns (markers) panels are cut. Using a straight knife cutting machine, multiple layers are cut. After cutting the panels, the stitching process is followed.
7. Stitching Process
7.2. Front neck binding – Similar to armholes binding, front neck binding is done using a flatlock sewing machine.
7.3. Back neck binding – Back neck binding is done using a flatlock sewing machine.
7.4. Shoulder join – left and right shoulder joining is done using an overlock sewing machine.
Note: Shoulder joining operation and neck binding operation can be done in another sequence of operations. First, join the left shoulder with the overlock machine, then do the binding operation for the whole neck. Then join the second shoulder.
7.5. Bottom hem – In a traditional vest design, a blind hemming machine is used. An alternative way of doing bottom hem, use double-needle flatlock machine which will give the look like t-shirts bottom hem.
Optional stitching processes
7.7. Flatlock stitch on the shoulder – this is also an optional stitching operation. On the shoulder seam, flatlock stitch is done with the top and bottom looper.
All the flatlock operations can be performed by one sewing operator. One operator is required for shoulder joining and another operator is needed for bottom hemming (blind hem). In bottom hemming, if you use flatlock machine instead of blind hemming machine, same flatlock machine can be used.
Related: Production process for T-shirt making (step by step guide)
8. Post-production processes
8.3. Printing on Vest – You might have seen, in a vest, there are two points. One in the left front chest (normally brand logo and punch line of the brand) and in the inside back yoke. Printing can be done by yourself using a heat transfer printer.
Label printing at back yoke below the back neckline – Labelling of vest size and brand name is an important process. Some brands also print care instruction on the back inside label.
8.4. Ironing/steaming – Ironing is done prior to folding and packing individual vests.
8.5. Final Checking – quality checking of each item is done for ensuring vest stitching quality, appearance quality and measurement.
8.6. Folding and packing – Folding of the vest are done manually or by using a folding machine. Folded vests are packed in a polybag.
9. Machine requirement for inner vest manufacturing
- Cutting table and cutting machine (Straight knife cutting machine)
- 3 thread overlock machine
- Double-needle flat-lock sewing machine
- Blind hem sewing machine
- Printing machine (heat transfer)
- Pressing equipment – Vacuum table and steam iron
- Knitting machine (optional)
10. Raw Material, Trims and packaging material
Normally, the following items are needed for making a finished inner vest.
- Knitted tube (knit fabric)
- Sewing threads
- Heat transfer papers (Label sticker)
- Quality checking stickers
- Cardboard
- Polybags
- Cardboard box (packing assorted vests)






Leave a Reply